
| 일 | 월 | 화 | 수 | 목 | 금 | 토 |
|---|---|---|---|---|---|---|
| 1 | 2 | |||||
| 3 | 4 | 5 | 6 | 7 | 8 | 9 |
| 10 | 11 | 12 | 13 | 14 | 15 | 16 |
| 17 | 18 | 19 | 20 | 21 | 22 | 23 |
| 24 | 25 | 26 | 27 | 28 | 29 | 30 |
| 31 |
- Mqtt
- Plugins
- .gitattributes
- Flutter
- sts4
- c++ set struct
- git 최초 설정
- esp-wroom-32d
- __snprintf
- OpenCPN
- OpenCPN설치
- c2678
- 설치 테스트
- git 대용량 파일
- _sprintf
- MFC
- winsock.h Broadcast
- LINK2001
- 멀티바이트 문자 집합 사용
- SQLite3
- 의존주입
- Console
- 확인할 수 없는 외부 기호
- 사전설치
- wxWidget
- 정적 라이브러리에서 MFC 사용
- ExtendWith
- OpenXLSX 한글
- __vsnprintf
- c++ Broadcast
- Today
- Total
세상을 이롭게
02. DB 연동하기 본문
MySQL을 사용하기로 한다.
https://dev.mysql.com/downloads/installer/
MySQL :: Download MySQL Installer
Select Operating System: Select Operating System… Microsoft Windows Select OS Version: All Windows (x86, 32-bit) Windows (x86, 32-bit), MSI Installer 8.0.31 5.5M (mysql-installer-web-community-8.0.31.0.msi) MD5: 7a83203e24f873b49fa2df2f1a58eca6 | Signatu
dev.mysql.com

다 설치하려 했지만 필요한 것만 설치하겠다.


----------------------------------------------------------------------------------------------------------------------------------------------------------------------------------------------------------------------------------------------------------------------------------------------------------------------------------
SpringBoot 에서 DataSource 를 처리하기 위해 크게 두가지 방식이 있다.
1. application.properties를 이용한 데이터 소스 처리
2. @Bean 어노테이션을 이용하여 데이터 소스를 설정
그중 1번으로 해보려 한다.
src/main/resources 폴더에 있는 application.properties 파일에 아래 내용을 작성한다.
spring.datasource.hikari.driver-class-name=com.mysql.cj.jdbc.Driver
spring.datasource.hikari.jdbc-url=jdbc:mysql://localhost:3306/insight?useUnicode=true&characterEncoding=utf-8
spring.datasource.hikari.username=****
spring.datasource.hikari.password=****
spring.datasource.hikari.connection-test-query=SELECT 1
username과 password는 본인의 것을 넣는다.
또한 configuration Package를 만들고 DatabaseConfiguration.java 파일을 만들고,
package com.apple.fox.configuration;

import javax.sql.DataSource;

import org.springframework.boot.context.properties.ConfigurationProperties;
import org.springframework.context.annotation.Bean;
import org.springframework.context.annotation.Configuration;
import org.springframework.context.annotation.PropertySource;

import com.zaxxer.hikari.HikariConfig;
import com.zaxxer.hikari.HikariDataSource;

@Configuration
@PropertySource("classpath:/application.properties")
public class DatabaseConfiguration {
	@Bean
	@ConfigurationProperties(prefix = "spring.datasource.hikari")
	public HikariConfig hikariConfig() {
		return new HikariConfig();
	}

	@Bean
	public DataSource dataSource() throws Exception {
		DataSource dataSource = new HikariDataSource(hikariConfig());
		System.out.println(dataSource.toString());
		return dataSource;
	}
}

// @PropertySource 를 더 추가하여 다른 설정 파일도 사용할 수 있다.
// 데이터베이스 관련 정보를 사용하도록 지정하는데 @ConfigurationProperties 어노테이션에 prefix가
// spring.datasource.hikari로 설정되어있기 때문에
// sping.datasource.hikari로 시작하는 설정을 이용해서 hikariCP의 설정 파일을 만든다.
위 내용을 넣어준다.
이대로 실행시키면 문제가 된다.
분명
[31mERROR[0;39m [35m4248[0;39m [2m---[0;39m [2m[ restartedMain][0;39m [36mcom.zaxxer.hikari.pool.HikariPool [0;39m [2m:[0;39m HikariPool-1 - Exception during pool initialization.
java.sql.SQLSyntaxErrorException: Unknown database 'insight'이런 에러를 뱉을 것이다.
이유는 application.properties 파일에 적은
spring.datasource.hikari.jdbc-url=jdbc:mysql://localhost:3306/insight?useUnicode=true&characterEncoding=utf-8포트 뒤의 문장에서 에러가 나는 것인데, insight라는 database schema가 없기 때문이다.
이를 해결하기 위해 다시 mySQL Workbench로 돌아가보자.
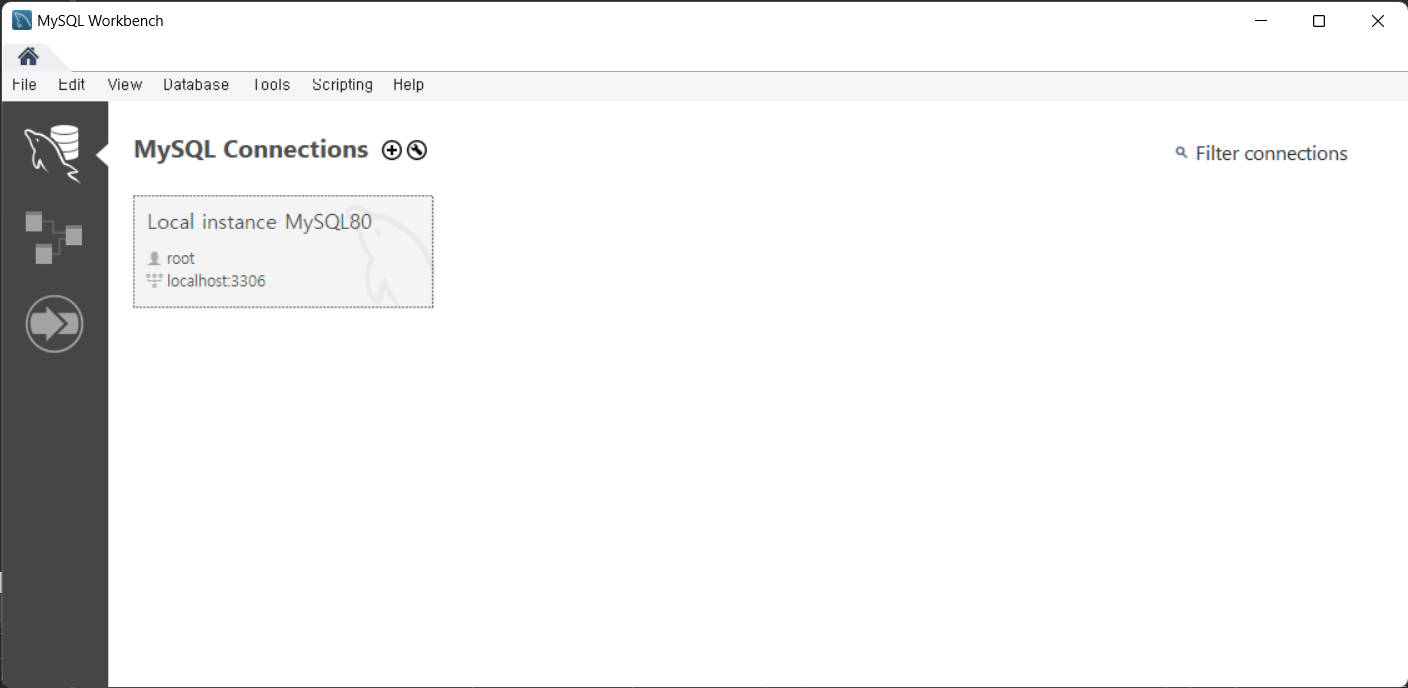


만들어주자.
application.properties 도 수정해주자.
spring.datasource.hikari.driver-class-name=com.mysql.cj.jdbc.Driver
spring.datasource.hikari.jdbc-url=jdbc:mysql://localhost:3306/fox?useUnicode=true&characterEncoding=utf-8
spring.datasource.hikari.username=****
spring.datasource.hikari.password=****
spring.datasource.hikari.connection-test-query=SELECT 1
잘된다!!!
마이바티스 설정을 해보자
package com.apple.fox.configuration;

import javax.sql.DataSource;

import org.apache.ibatis.session.SqlSessionFactory;
import org.mybatis.spring.SqlSessionFactoryBean;
import org.mybatis.spring.SqlSessionTemplate;
import org.springframework.beans.factory.annotation.Autowired;
import org.springframework.boot.context.properties.ConfigurationProperties;
import org.springframework.context.ApplicationContext;
import org.springframework.context.annotation.Bean;
import org.springframework.context.annotation.Configuration;
import org.springframework.context.annotation.PropertySource;

import com.zaxxer.hikari.HikariConfig;
import com.zaxxer.hikari.HikariDataSource;

@Configuration
@PropertySource("classpath:/application.properties")
public class DatabaseConfiguration {

	@Autowired
	private ApplicationContext applicationContext;

	@Bean
	@ConfigurationProperties(prefix = "spring.datasource.hikari")
	public HikariConfig hikariConfig() {
		return new HikariConfig();
	}

	@Bean
	public DataSource dataSource() throws Exception {
		DataSource dataSource = new HikariDataSource(hikariConfig());
		System.out.println(dataSource.toString());
		return dataSource;
	}

	@Bean
	public SqlSessionFactory sqlSessionFactory(DataSource dataSource) throws Exception {
		SqlSessionFactoryBean sqlSessionFactoryBean = new SqlSessionFactoryBean();
		sqlSessionFactoryBean.setDataSource(dataSource);
		sqlSessionFactoryBean.setMapperLocations(applicationContext.getResources("classpath:/mapper/**/sql-*.xml"));
		return sqlSessionFactoryBean.getObject();
	}

	@Bean
	public SqlSessionTemplate sqlSessionTemplate(SqlSessionFactory sqlSessionFactory) {
		return new SqlSessionTemplate(sqlSessionFactory);
	}

}

// @PropertySource 를 더 추가하여 다른 설정 파일도 사용할 수 있다.
// 데이터베이스 관련 정보를 사용하도록 지정하는데 @ConfigurationProperties 어노테이션에 prefix가
// spring.datasource.hikari로 설정되어있기 때문에
// sping.datasource.hikari로 시작하는 설정을 이용해서 hikariCP의 설정 파일을 만든다.
스프링이 아닌 마이바티스 단독으로 사용할 경우는 SqlSessionFactoryBuilder를 사용하자.
또한 마이바티스 Mapper 파일의 위치를 설정할 것인데 나중에 만들것이기 때문에 먼저 위치를 설정한다.
많은 수의 매퍼 파일이 존재하고 하나씩 등록하기 어렵기 때문에 패턴을 기반으로 하는 것이 좋다.
자 이제 매퍼 폴더를 생성해보도록 하자
src/main/resources 경로 밑에 mapper 폴더를 생성한다.
classpath 는 resources 폴더를 의미하고
/mapper/**/ 는 폴더 밑의 모든 폴더를 의미한다.
/sql-*.xml 은 이름이 sql- 로 시작하고 확장자가 .xml 인 파일을 의미한다.
마이바티스 연결 확인해보도록 하자

src/test/java 에 아래 내용을 추가해준다.
package com.apple.fox;

import org.junit.jupiter.api.Test;
import org.junit.jupiter.api.extension.ExtendWith;
import org.mybatis.spring.SqlSessionTemplate;
import org.springframework.beans.factory.annotation.Autowired;
import org.springframework.boot.test.context.SpringBootTest;
import org.springframework.test.context.junit.jupiter.SpringExtension;

//@RunWith(SpringRunner.class) JUnit5부터는 아래의 것을 사용하게 되었다.
@ExtendWith(SpringExtension.class)

@SpringBootTest
class FoxApplicationTests {

	@Autowired
	private SqlSessionTemplate sqlSession;

	@Test
	void contextLoads() {
	}

	@Test
	public void testSqlSession() throws Exception {
		System.out.println(sqlSession.toString());
	}

}
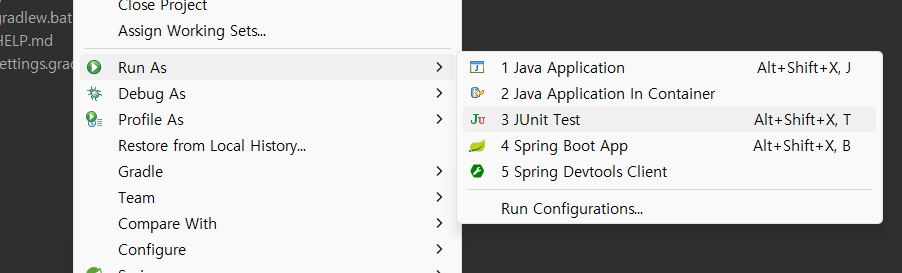
코드 작성이 완료되면,

'Spring' 카테고리의 다른 글
| [개념정리] DI(의존주입)와 IOC(제어의 역전) (0) | 2023.08.26 |
|---|---|
| 01. STS4 설치하기 (0) | 2022.11.05 |
| SpringBoot_(1)_개발환경 (0) | 2020.02.27 |
| SpringBoot_(2)_Securing a Web Application (0) | 2020.02.27 |


